The Windows 8 UI (user interface), formerly known as “Metro” is quite different from the regular Windows desktop, but underneath the new Start Screen, you’ll find that the underlying desktop hasn’t unchanged. Microsoft released the Windows 8 OS as a way to bridge the gap between touch devises with the regular desktop. That means you’ll be able to navigate through the computer using taps and swipes on a monitor that supports touch. Windows 8 introduces the new Start Screen to replace the standard start button in the taskbar. You’ll find that the Start Screen works much like the Windows Phone OS, where the Start Screen becomes your “hub” for apps.
If you don’t have touch support, you can still use Windows 8 because you’ll be able to use a mouse and keyboard shortcuts to do that same things touch users can. At first, I had a bit of trouble learning how to navigate through the Windows 8 UI, and I was really unsure about Microsoft’s change in direction from the traditional desktop. However, once I got over that learning curve, I found myself liking it more and more.
Hopefully, by reading this guide, you’ll learn what you need to know to quickly get over that learning curve and be on your way to taking advantage of what Windows 8 has to offer. I didn’t have the chance to try Windows 8 with touch, so this guide will primarily focus on mouse clicks.
Account
To take advantage of some the features on Windows 8, you’re going to need a Microsoft account. You’ll need an account in order to use SkyDrive, an online backup feature that allows you to store up to 7 GB of files for free in the cloud. It’s also required if you want to download apps from the Microsoft Store. You can get by using Windows 8 without an account if you don’t plan on using Windows 8 apps very much, but to get the full experience, you’re going to need one.
Start Screen
When you first start your computer, you’ll end up at the Start Screen and see groups of tiles that represents apps. Some of these apps are Windows 8 apps, while others are shortcuts that will open applications onto your desktop. There’s a tile in the Start Screen that represents your Desktop and acts like a single Windows 8 app. The Desktop app will take you to the traditional desktop.
A Windows 8 app will open up into its own full screen. There’s some leeway for customization where you can open up another app (refer to Snapping Left and Right), but it isn’t like being able to move around windows freely on your desktop. The duality of the “apps” does not produce a seamless user experience, but maybe that will change as more developers work on making applications compatible with the Windows 8 UI.
You can customize your Start Screen apps by right clicking on the tiles and pinning or unpinning it. You’ll also options to Uninstall or change the tile size. Right clicking in empty space will show an option to go to “All apps” in the bottom left hand corner. Clicking this will display a list of all applications on your computer, similar to where you would traditionally click Start -> All Programs, which you can then pin to the Start Screen. The tiles can also be dragged around and grouped with other tiles for further customization.
Hot Corners
The interface revolves around what is called Hot Corners. Hovering your mouse over certain corners will reveal certain options.
- Top-left: Gives you a preview of the last app you opened. Clicking on it will bring you to the last open app and will cycle through your open apps.
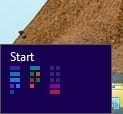
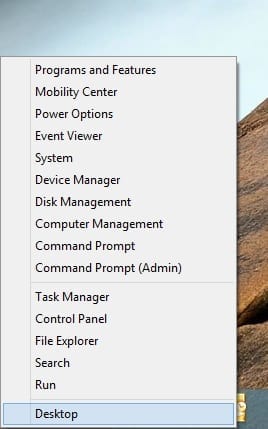
- Bottom-left: You’ll notice that the Start button is missing from the taskbar, but this new hot corner will replace it. If you’re in an app, clicking the bottom left will bring you back to the Start Screen. This corner for the Start Screen will show a preivew of your last open app and will take your there. The Windows key on your keyboard performs the same action.
Right clicking this corner instead, will provide you with a few other options as shown in the picture.
- Top-left-down/Bottom-left-up: You’ll see a preview of all the apps you have opened and are running. The Desktop is considered to be one app so open files on your desktop will not appear on the list. Right clicking these previews will give you the option to close them or snap them left or right.
- Top-right/Bottom-right: This opens up the Charms Bar. The Charms Bar gives you the option to search for apps, to share something (depends upon what app is open), return to the Start Screen, see connected devices, and change settings. Opening Settings will show you options for adjusting screen brightness, network/wifi connections, volume, accessing the control panel, and power options like turning off your computer. You’ll also be able to change your PC settings here.
Snapping Left and Right
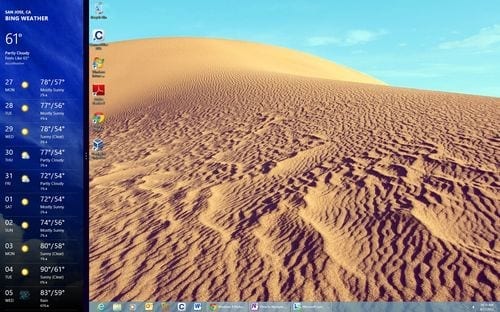
You can snap your app the left or right side of the screen. What this means is that you’ll have a smaller preview of the app on the side of screen while another app is open in a larger area of your screen. At any one time, you can only snap one app. To do this, you can right click on a minimized app and select the option to snap it. If you’re in the open app, you can move your mouse to the top of the screen so that it turns into a hand and drag the app to the left or right side of the screen. If there’s a way to un-snap the app to full screen, I haven’t figured it out yet. To close the snapped app, drag the app down to the bottom of the screen, and the app will close completely.
If you snap your Desktop, you’ll see previews of the applications you had open. Clicking on one will open the Desktop app completely and removes it from the side of the screen.
And there you have it. I hope this quick guide on learning how to use Windows 8 helps you!


